Facebook and Instagram paid campaigns are two of the most used channels among all industries. Covering all the demographics with almost 4 billion active users total; Facebook and Instagram are the best channels to reach your target audience. From a wide range of ad campaigns; using Facebook / Instagram ads allows you to:
Let’s see how you can advertise on these platforms:
Facebook Business Manager is a very advanced tool that allows you to manage your various digital marketing actions such as:
and many more.

You can start by creating a Facebook Business account with any email address. If you want to create Facebook / Instagram campaigns using Business Manager, you need to add an advertising account to it.
In the Business Manager, under the Accounts menu of the Business Settings menu, click on the Ad Accounts button and add the ad account with the + Add button.

After adding pages and creating an Ad account, you can start creating your campaigns.
When you click the Create Campaign button, you will see the screen below.
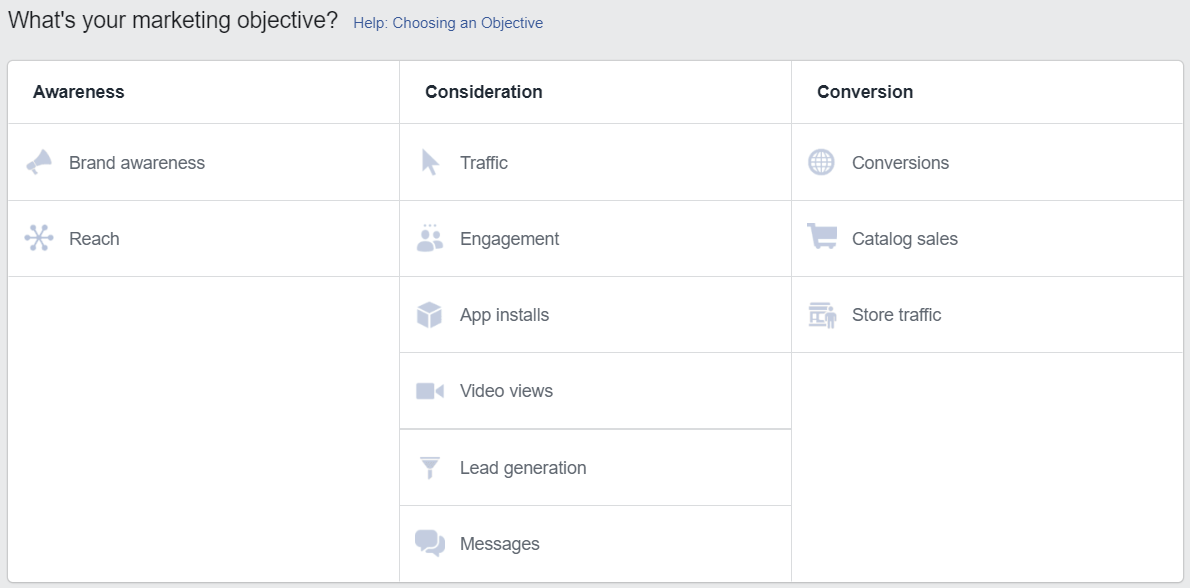
In this area, you need to set your campaign goal. Choosing an objective is very important since your ad types and measuring your campaign success will be based on this decision.
Brand Awareness: Select if your goal is to create brand awareness.
Reach: Select if your goal is to reach more people.
Traffic: If you have a website and want to drive traffic to this site, this campaign model should be selected.
Engagement: If you aim to increase likes and shares on your Facebook page and posts, you should proceed with this selection.
App Installs: This targeting is a type of campaign that only allows brands with a mobile app in the iOS or Android app stores to promote their app and increase the number of installs.
Video Views: If the purpose of your campaign is to have people watch your videos, you can choose this method.
Lead Generation: Brands who want to gain customer information can benefit from this campaign target. In this model, you create a form on Facebook and you can direct the ads to this form.
Messages: In this campaign model, you can reach your target audience by creating your ads in the form of messages via Facebook Messenger.
Conversion: It is used when you have to count certain targets (sales, lead, subscription, account creation, etc.) on your website. To do this, you need to perform a conversion setup with the help of pixels on Facebook. It is a campaign model that should be used to measure campaign efficiency accurately.
Catalog Sales: If you have an e-commerce site and you are selling a large number of products, each product is a campaign model that allows you to place all the products in the ads with the help of the feeds you create instead of opening special ads.
Store Traffic: It can be used for brands with physical stores to attract customers to their stores through Facebook ads.
After choosing the most suitable campaign model for your brand/product or service, you should name your campaign. Since you might have different campaigns in the future, it is important to give a definable name so that it will be easier to remember when monitoring.
In this article, we give an example through a Traffic targeted campaign.
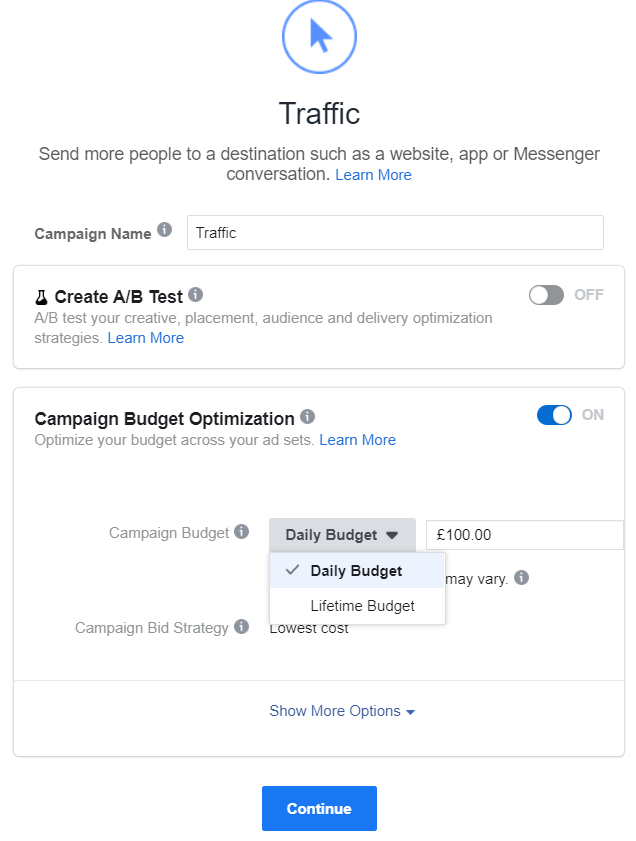
The “Create A/B Test” section allows you to build separate campaigns as advertisement, placement (Facebook, Instagram, Messenger), or A/B according to your audience targeting.
If you activate the Campaign Budget Optimization section, you can enter the campaign budget as daily or in total from this field. Otherwise, you can enter your budget in the ad sets you will create in the next step.
In the Creative Set section, you need to choose one of the Websites, App, Messenger, or Whatsapp options from the Traffic field and choose which channel you want to direct traffic to.
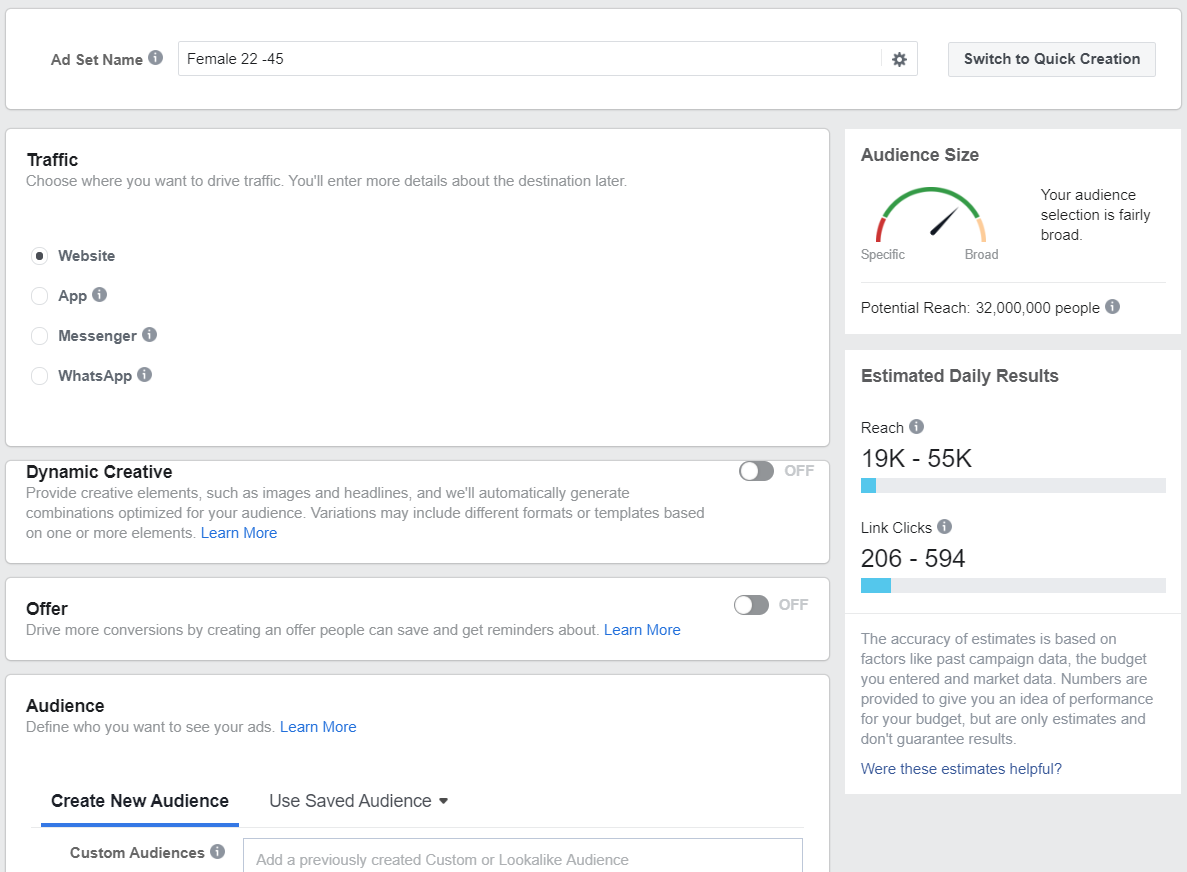
The audience part is where you will choose the audience you will target.
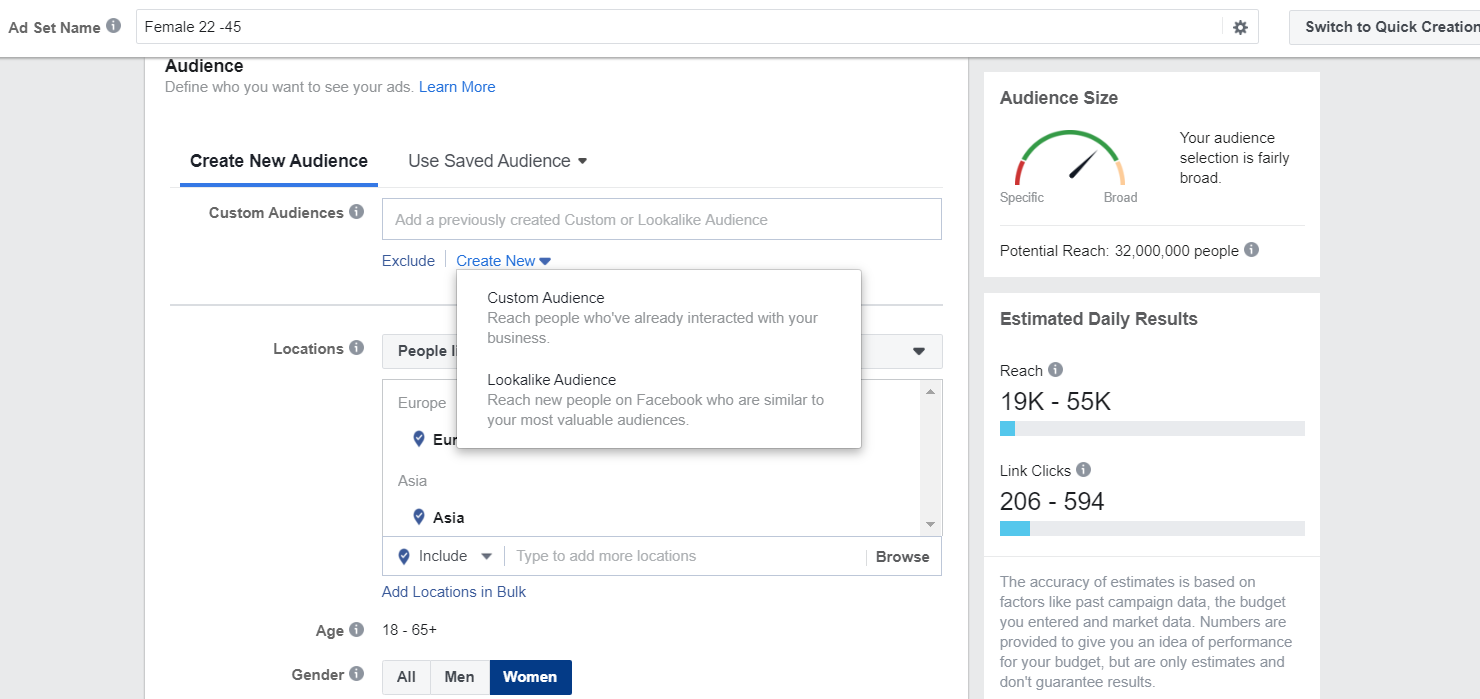
When you select the Create New Audience option, you will see the Custom Audience and Lookalike Audience options.
Custom Audience offers options that allow you to target the audience that previously interacted with you. You can create a remarketing campaign by targeting audiences such as:

Of course, you need to take certain actions to use some of this data. For example, for those who visit your website, you need to take the pixel code from the Facebook Business Manager, add to your website and wait for an audience.
To create campaigns where you can reach completely new audiences besides the custom audience, you can search by looking up your important keywords or sectoral terms related to your audience from the “Detailed Targeting” section.
On the other hand, by clicking on the Browse section, you can go through the options that are suitable for the campaign and audience target from the Demographics, Interest, and Behaviors sections, and look for sub-breakouts.

The detailed targeting section offers comprehensive targeting. Age and gender options are also available in this area.
Another detailed section here is the locations section. In location targeting, you can proceed with one of several options including continent, country, city, or even postal code. In this targeting, you can use the pinpoint option and determine the radius. Using pinpoint can be very efficient especially in local campaigns.

In addition, by clicking on Add Locations in Bulk, information on batch locations prepared in a document can be imported with a single action.
Language can also be selected through the Facebook Language section.
Additionally, there is a connections section. This allows targeting in different details such as those who like your Facebook page, those who use your mobile application, etc. However, keep in mind that the targeting in this area will create an intersection set with the targeting you make and will narrow the audience you choose.
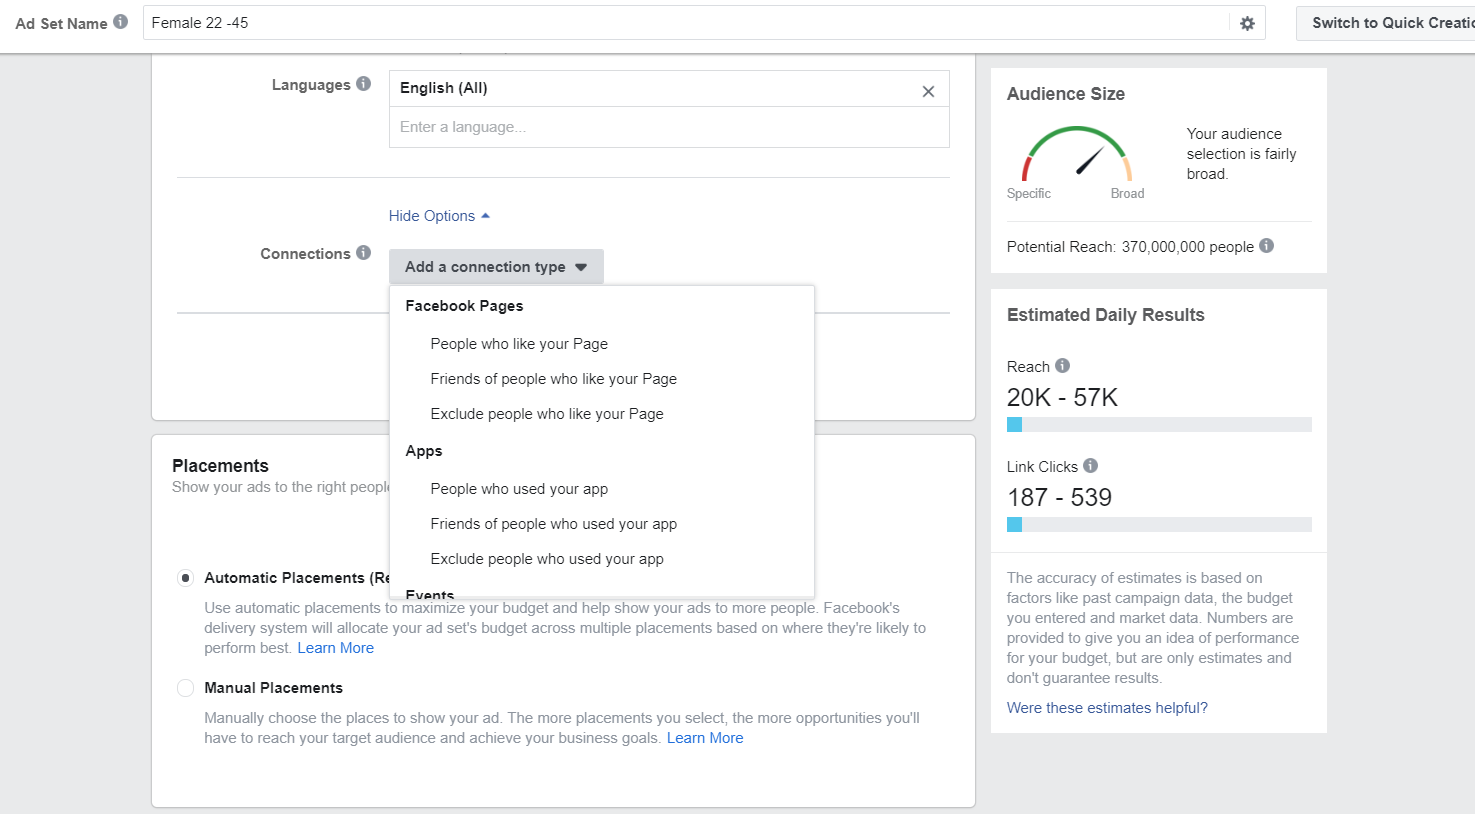
As a result, we created an audience like this in the targeting of our campaign in the example below.

On the right side of the targeting area, you will see the predictions of this detailed target audience – your target audience size, estimated daily reach, and clicks.
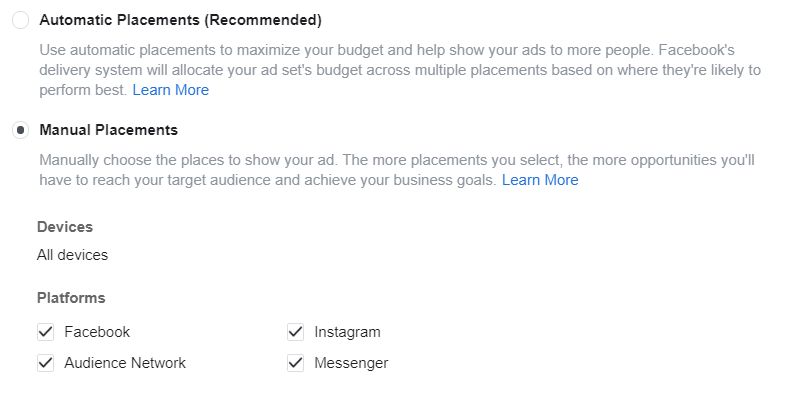
After targeting, you will see the Placement area at the bottom. In this area, you will actually choose the main channels of Instagram, Facebook, and Messenger, and their sub-placement and determine in which areas your ads will appear.
With Automatic Placement, your ad will show in all areas, and with Manual Placement, you can select the “Devices” first. Then the main platform is selected. As you can see below, there are 4 main platforms.
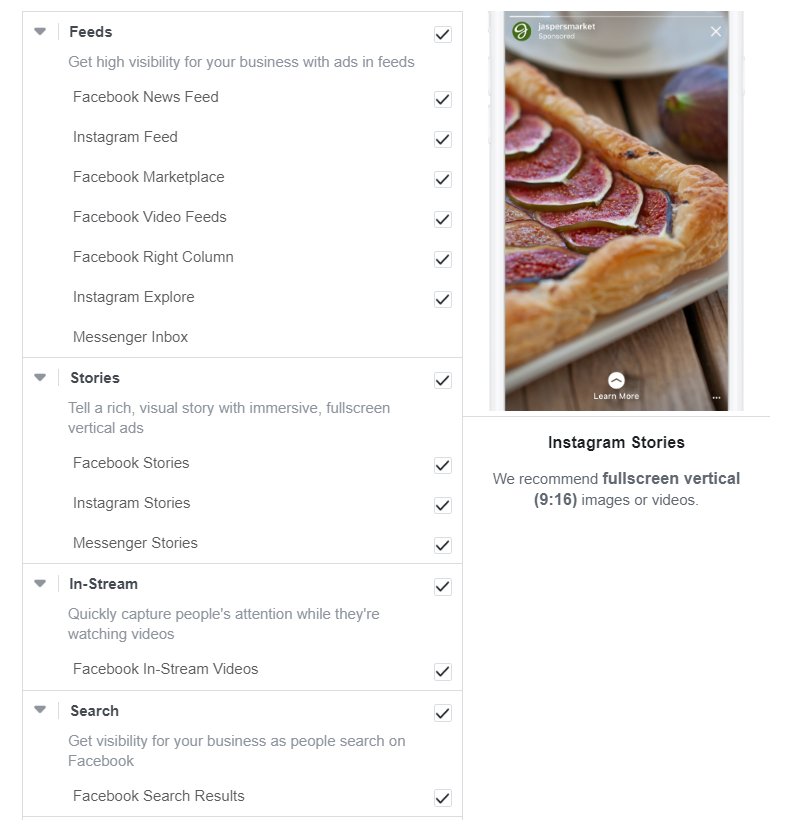
In the sub-break of these platforms, you can see the last place your ad will be placed in detail. In the example below, you can see an Instagram targeting and see how your ad will appear from the previews when you move your mouse over the placement options.
In the Budget & Schedule section, you first choose which metrics to optimize your campaigns. Here you can choose one of the options according to your target, such as clicks, impressions, landing page views, etc.
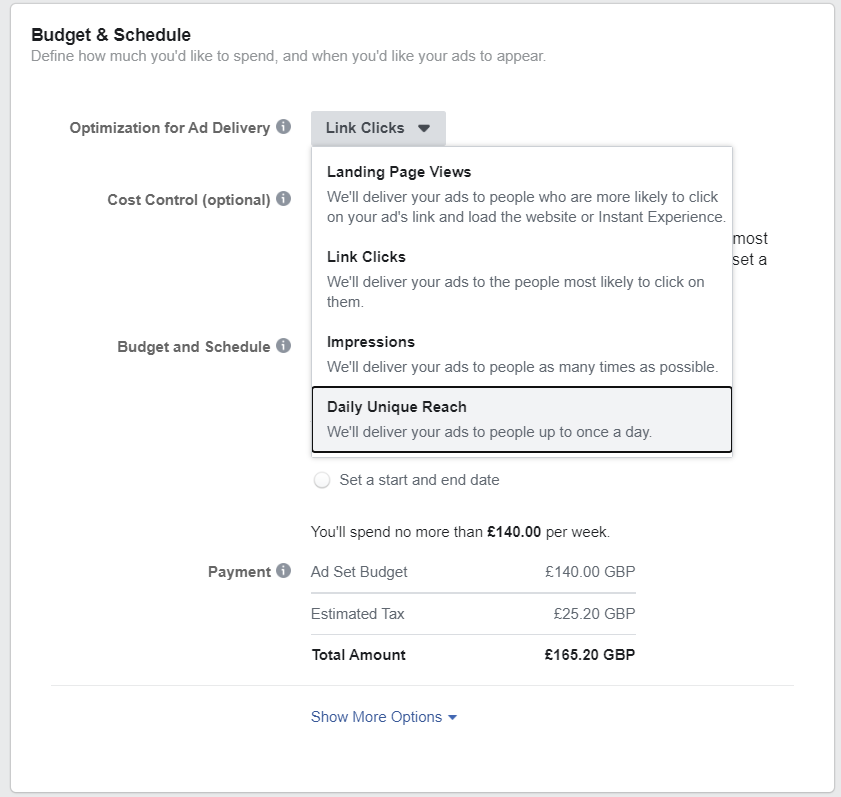
Then you will enter a daily or total budget from the “Budget and Schedule” section. As you enter your budget, you will find that the estimation changes accordingly.
After the budget entry is completed, you have done the targeting and created the ad set and can now move on to creating an ad.
An ad contains ad texts, ad images, or videos. After determining the ad name first, you select where your ad will appear on the Facebook page and your Instagram account. If you have not chosen your page and account yet, you should define these adjustments and authorizations before you proceed.

After the page and account selection, a 3-tab view welcomes us. Here you can create a new ad, highlight an existing post, or use a mockup.
In the Use Existing Post section, one of the posts previously shared on the Facebook page or Instagram account can be selected as an advertisement.

In this example, we will create a new advertisement with the Create Ad button.
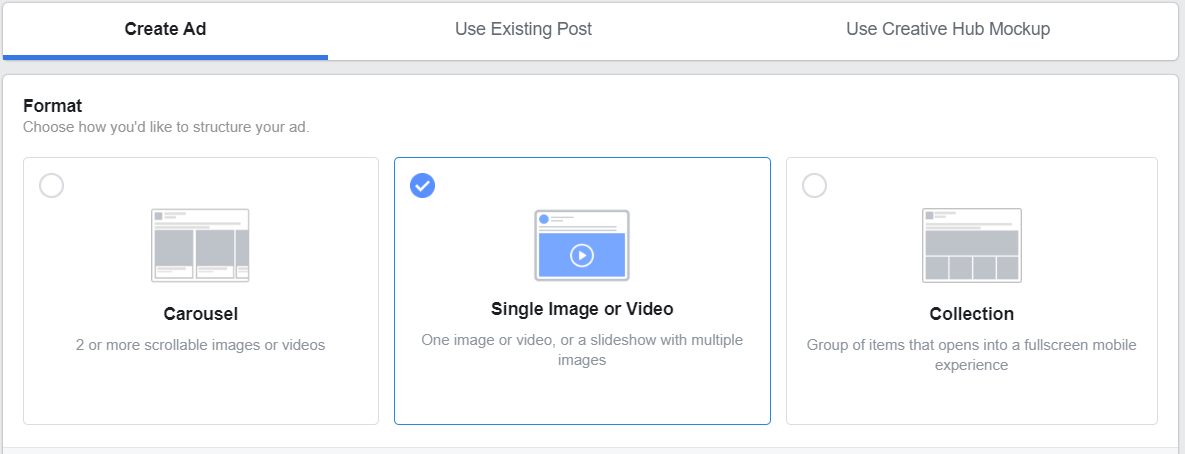
From the Format section, we select from the Carousel, Single Image or Video or Collection models.
There is also an advertisement option in the Add An Instant Experience section in the lower area, which allows you to create an advanced mobile landing page that only works on mobile devices.

However, in this article, we will select the most preferred Single Image or Video format and continue with it as an example.
First, we upload the advertisement image or video with the Add Media button from the media section. You can choose from your library.

After selecting the ad image or video, you can continue by entering the texts in the fields below.
As you can see there are many ext entry fields. By entering the texts in these fields, you can see real-time where exactly they will appear in the right-side preview. You can look at the previews in different areas by navigating with the mouse.
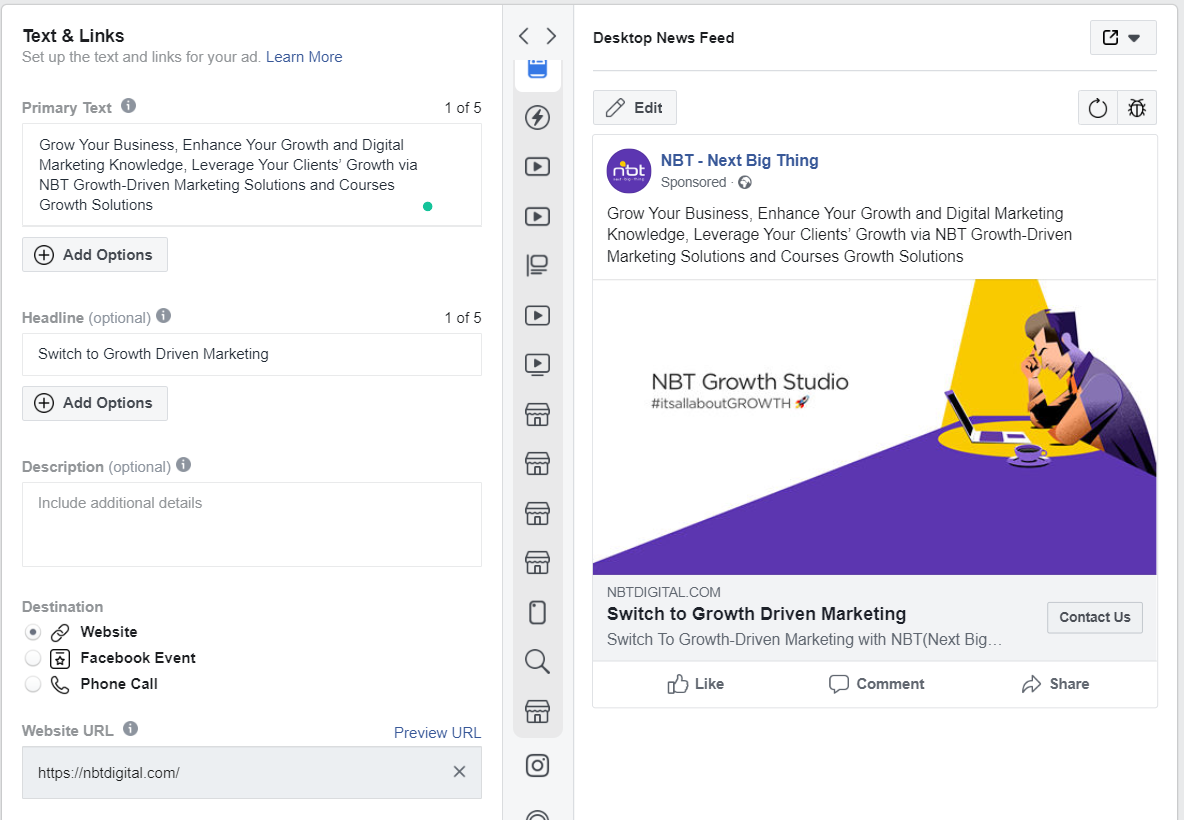
You can add different variations to the texts with the Add Another Option buttons.
After entering the ad texts, you will need to determine the URL of the site to which your ad will be directed and the call to action button.
The ad creation process ends after selecting from the language option that provides automatic translation of the texts and the Facebook pixel code that allows the tracking of the ad.

You are good to go! Everything you’ve created is now directed to the ad review. After the review process, the campaign and ads are published by Facebook unless there is some policy issue.
Facebook/ Instagram advertising is just a small fraction of Paid Media and PPC Marketing. So we recommend you to get familiar with the whole concept of Paid and PPC marketing to be able to utilize each channel effectively.
Since paid media marketing is an essential component of business growth, it needs to be planned carefully. You need to strategize wisely, calculating all the angles and components (such as main goal, budget, target audience’s needs, and the characteristics of each paid media channel) to be able to measure, report, and optimize.
In order for you to plan and track your PPC activities easily, take a look at our Paid Media and PPC Planning Guide and learn how to create a paid media marketing plan with some growth tactics to use in your paid media marketing activities. Moreover, here’s our tool for Paid Media and PPC Planning for you to practice and exercise on how to create new plans and track them.
Last but not least, here’s also a wide range of PPC tactics we have prepared for you to implement to your growth marketing activities. You can choose the tactics according to your main goals (Brand awareness + traffic generation, conversion, and retention) as well as the difficulty level (beginner, intermediate, advanced).
